Posts tonen met het label experimenten. Alle posts tonen

dinsdag 15 maart 2016

CNC milling and 3D printing, by Kotryna Valeckaite


Today as a part of our minor our student group was introduced to CNC milling and 3D printing with Ultimaker2. Since we were free to choose the tryout objects, we decided on one of the .stl files we extracted from the CT scans. “Harry”, as our focus object, seemed like a great begin. Yet just after loading the files to Cura (the Ultimaker software), we noticed that the model was not completely straight. That was due to its original position during the scan. In other words, the object nested in-between two other objects was not completely parallel to the ground plane. This we tried to fix by manually rotation in Cura. In the end, it was not perfect and due to that the bottom edge of the cup was sketchy. Moreover, Ultimaker 2 seemed not like the right machinery for such task. That was mostly because we had many open, hanging edges and pieces which had to be supported. The latter is possible with the same material, but that leaves clear marks on the surface.
Removing support structure
Final product
Final product (1:2)
Parallel to 3D printing we also did some CNC milling. Just like in Ultimaker, we used “Harry”. For this production technique we used DeskProto. This program both translates the files for the machine and helps to create a frame for the object (mostly necessary to get a clear reference point). However, the latter can also be manually done in other CAD software.
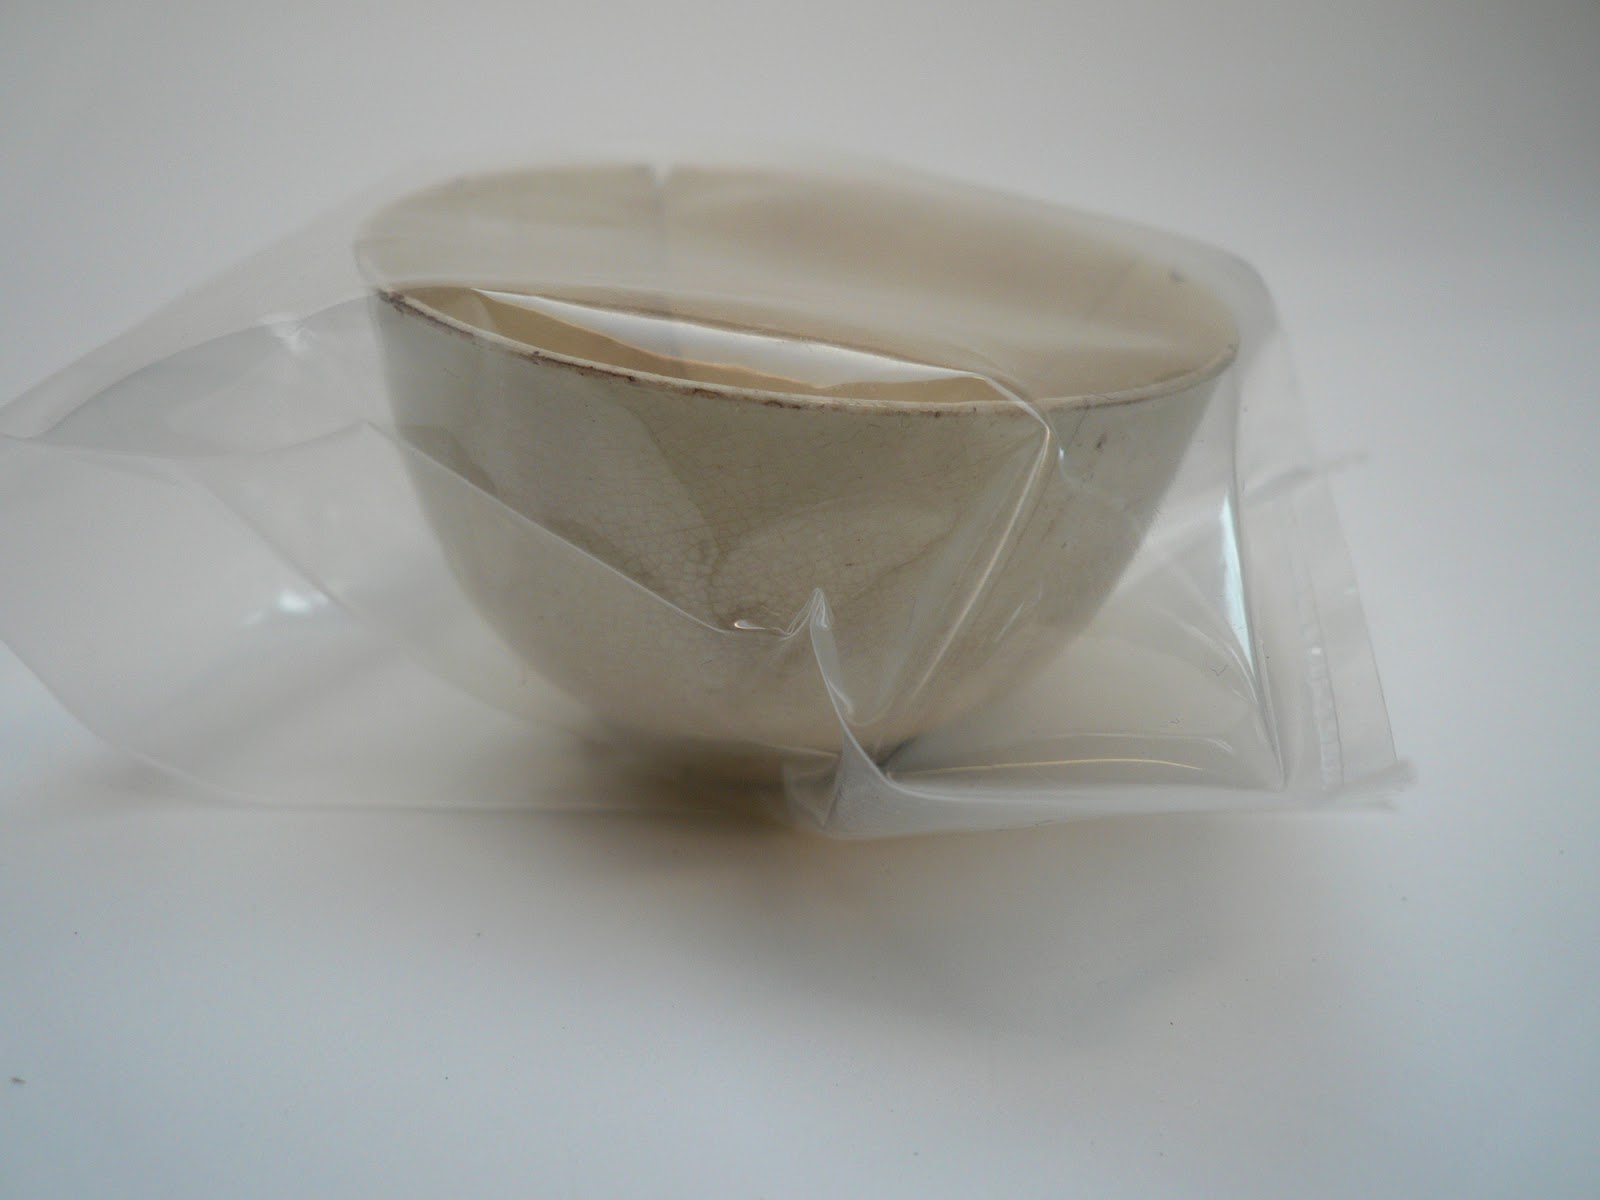
Production of the object took merely 15 minutes, but we did not strive for the highest resolution. That meant that we took the biggest cutter available (d8mm) and got a sketchy cup with clear stepping. Moreover, due to the cavity in the cup and flexibility of the material, mistakes were made (seen in the picture below) and the model was very flaky.
foam harry
“Harry” from foam (1:1)
Since we had more than 1,5h left, we proposed to make another model in CNC machine. This time to see how much detail we could achieve. For this task we chose “Hermione” as the model, yet due to the time limitations we could only take a piece of it.hermione  We worked on the object from 3 sides, starting with 8mm cutter and finishing with 4mm. This procedure took at least twice as long as the previous one. What is more, during the first try the foam melted, completely destroying the model. In the end, results of the second one were not as clear as in the digital model, but still quite amazing: knowing that we used very soft foam, could not precisely put the model on the reference point and that we did not use the smallest cutter.
Foam "Hermione"
Foam “Hermione” (1:1)
In conclusion, the CNC milling could be an option for the final product, if we went for a single material transparent/translucent look. This would be possible by milling stacked and glued plexiglass. 3D printing in single material is also very interesting, but with this we would have to sacrifice some of the qualities of the end product (historical footprint, practicality, aesthetics).

maandag 8 februari 2016

Processing scans into 3D models (take 1), Kotryna Valečkaitė

Comparison of image processing software 1

Directly after receiving the scans on Tuesday we jumped into processing them into 3D models. To keep it clear we used “Hagrid”(obj. 5) as an example for all of the programs.
As noted in the previous post, this process has multiple steps and in order to gain the highest level of detail, a lot of tweaking is necessary.
The usual procedure goes as follows:
(0. Changing the .ima or .dcm files into program compatible format. Most of our scans were made in .dcm format which was not compatible with multiple programs: so far we tried RenameMaster, which did not work)
  1. Loading the .dcm or .ima files into a 3D processing program. These file formats actually contain only 2D information: the sections of the object. In other words, the 3D model is an interpretation of multiple sections and therefore steps between them might be visible, if the resolution is not high enough.
  2. Selecting threshold and filtering the right information. Depending on the program this step might be automatized. If not, it might be very heavy on your computer. Therefore, a device with a good graphics card and 16GB RAM is advised (it would work on 6 or 8GB RAM, but it goes slow and tends to crash often).
  3. Loading the 3D file into a volume renderer to get an editable mesh (.stl). 
To begin with, we started with Seg3D. This program did not want to read .dcm files, thus we only worked with test files, which were in .ima format. The interface was clear, but to extract minuscule details it needed a lot of filtering and playing with histograms. That was extremely hard on our computers (6-8GB RAM, 2.0-2.03GHz) and took over an hour to get a decent file. Moreover, the final result is given in .nrrd format which later has to be translated to .stl with the help of ImageVis3D. The file looked rather detailed in Seg3D, but the final .stl was worthless.Capture
Hagrid_Seg3D to ImageVis3D_128x128x54mesh_detail
Later on, we received a tutorial from an past student of our supervisor Maaike. It suggested using DeVide. Unlike the previous program this one works on the basis of visual programming. Thus all of the steps can be easily retraced. This program can directly export to .stl reducing the possibility of getting a very rigid mesh, like with Seg3D. Unfortunately, the program did not want to work on our computers.
After this failure we contacted one of the researchers in the faculty of Industrial Design Engineering. He adviced to try out the following programs:
  1. 3D slicer (open source)
  2. Avizo (paid, evaluation copy available after contacting the firm)
  3. Mimics (paid, evaluation copy available after contacting the firm)
The first of the list (3Dslicer) proved to be very user friendly (although it did not read the .dcm files). The information is collected automatically after choosing a preset and is quite precise. One can also select if to smooth the surface: both outputs are interesting in form, with the edgy one as an expressive interpretation of a kitschy object of the past. If used for the final product, more mesh post-processing is necessary
3DSlicer_screenshot
Hagrid_3DSlicer_nonsmoothedges_detail (1)
Hagrid_3DSlicer_smoothedges_detail
To be continued…

vrijdag 18 december 2015

3D scanning and priorities, by Kotryna Valečkaitė

As the project slowly went into motion we had the first digitizing session in the laboratory of Geosciences&Engineering. Our group was provided with the luxury to first hand observe both micro- and macro-CT scanners in working. Both with their advantages and limitations, they gave us a new perspective of how to order and process given archaeological objects.
When Maaike came in with boxes full of ceramics from the Archaeological archive of Amsterdam, we understood that it was neither efficient, nor possible to scan them all. At this point selection was crucial. At first sight we had three main groups of objects: lice combs (highest level of detail), broken colored ceramics bound with metal strings (necessity to make more detailed scans to understand the technique) and sets of white ceramic tableware lacking multiple shards.
DSC_0381DSC_0307Detail hermione
The latter seemed to be the closest to the issues visible in the goal of the project. Yet the other two gave us interesting side paths which would improve overall understanding of the methods and possibilities of 3D scanning. Based on this, we made a queue sorted by importance, which would lead to at least one object of a group scanned.
DSC_0292
After the first inspection of the digitized forms we were rather amazed that the precision of 0,3mm was not sufficient for some of the fine-detailed specimens. E.g. the combs lost their teeth, metal bindings were muffled, crack lines barely visible. Consequently we were offered to work with much finer machinery (micro-CT scanner) mostly used for small scale material research. Yet the time and money needed for this method led to only two specimens scanned: the finest ivory comb and a detail of a metal connection. In total we got 13 scans, excluding identical scans in higher precision. The notes and conclusions after this are as follow:
1. There are 2 CT-scanners in the Geoscience&Engineering laboratory:
  • Macro-scanner can be used to scan rather big objects, but the fine details are almost completely neglected; object is stationary, thus there is a small chance of damage. Precision 0,3mm.
  • Micro-scanner is very slow (1h per object) and has very limited object size: till 100-120mm in diameter; object is rotating, thus it needs to either be glued or fixed, which requires extra attention not to damage the object. Precision 0,03mm.
  • Both scan only the form and not color; they can detect cavities, but not slight changes in the material density
2. The digitized forms are saved as 2D images of section cuts in .dcm or .ima file format, which need multiple steps to be converted into editable 3D objects. Even though we were informed that it is a very quick procedure, to gain fine details it is necessary to have a powerful computer(16GB RAM) and correct software (which is usually paid).

maandag 14 december 2015

Objecten selecteren: 'industrieel' aardewerk


De eerste groep van objecten die ik geselecteerd heb bestaat uit vroeg industrieel aardewerk. Dit is het echte ‘niets aan de hand’ dagelijkse en onopvallende gebruiksgoed van de 19e eeuw. Juist dit aardewerk is alleen uit opgravingen ‘over gebleven’ en komt nauwelijks voor in museale collecties. Op deze opgegraven voorwerpen zijn goed de sporen van productie, gebruik, slijtage en afdanken terug te zien. Deze sporen wil ik een hoofdrol laten spelen in nieuwe ontwerpen.
Hier onder kun je een selectie van deze objecten zien: (zijn ze niet bloedstollend prachtig!)

OZV7-17-61

OZV7-17-61
OZV7-17-61

OZV7-17-163

OZV7-17-163

OZV7-17-163

OZV7-17-163

OZV7-17-18

OZV7-17-18

OZV7-17-18

maandag 30 november 2015

Erfgoed in gebruik nemen: inleiding op het project


Ik ben ontwerper en werk binnen Studio Maaike Roozenburg aan projecten op het snijvlak van design, (kunst)historie en visuele communicatie. De afgelopen jaren in het bijzonder aan het project Smart Replicas in samenwerking met musea, wetenschappers, studenten en technische bedrijven. Een project over erfgoed waarin design en techniek samenkomen. ‘Smart replicas’ is een term die ik gegeven heb aan replicas van historische gebruiksgoed die zijn gemaakt middels een combinatie van 3D scan- en printtechnieken. Op deze manier worden museale stukken opnieuw dagelijks gebruiksgoed. Met augmented reality worden de Smart Replicas verrijkt met verhalen over de geschiedenis van de objecten. Met een smartphone kunnen de replicas ‘uitgelezen’ worden. Het historisch object met haar geschiedenis terug op de keukentafel.


Het prototype dat tot nu toe is ontwikkeld van de Smart Replica is een ‘proof of concept’ en ‘proof of technique’. Ofwel, we zijn vooral bezig geweest om het technisch te laten werken. En om een betekenisvolle AR ‘laag’ te ontwerpen van 3D informatie en historische bronnen. Dit is nu gelukt.
Echter, de artistieke kant van de Smart Replica zelf, de kwaliteit van het fysieke object, is nog niet uitgewerkt en in een ‘schets fase’. En juist dit onderdeel is artistiek inhoudelijk zo interessant: Hoe kun je de grenzen van het fenomeen replica oprekken? Het gaat daarbij niet om een letterlijke kopie, maar om het onderzoeken en articuleren van die aspecten van het origineel die nu relevant voor ons zijn. Daarin vindt een samenspel plaats van materiaal, techniek, oppervlakte structuur, detaillering etc. Hoe verhoudt de replica zich tot het ‘origineel’?
Hoe kunnen ‘high’ tech en ‘low’ tech (historische technieken) op een interessante manier bij elkaar komen?
Hoe behoud je de integriteit van het origineel en maak je het betekenisvol gebruiksgoed voor het heden?

Om dit te kunnen onderzoeken en uitwerken  is een samenwerking aan gegaan met de Gemeente Amsterdam: Monumenten en Archeologie. Zij hebben een indrukwekkende collectie historische gebruiksgoed en kennis over dit gebruiksgoed. In tegenstelling tot de musea en museale collecties waar tot nu toe voornamelijk mee is gewerkt, ligt bij de Archeologische dienst de nadruk op gebruik, en het object als historische bron. Zij verzamelen niet voor de mooi, of de pronk, maar om het dagelijks leven van mensen te reconstrueren. Juist dit vind ik als ontwerper inhoudelijk heel interessant: voorwerpen die dagelijks zijn gebruikt totdat ze kappot gingen. Beschadigde en gerepareerde objecten, gebroken en onvolledige voorwerpen.


maandag 26 oktober 2015

Uitnodiging: Science Fair TU Delft

Het maken en breken van alledaagse gebruiksvoorwerpen is van alle tijden. Omdat vroeger de waarde van deze objecten hoger was dan die van arbeid, werden ze meestal gerepareerd. In dit project worden alledaagse gebruiksvoorwerpen uit het verleden met behulp van CT-scanners in kaart gebracht, om vervolgens een 3D-reconstructie te maken. Hierdoor kunnen we erfgoed weer tot leven brengen als gebruiksgoederen in de huidige tijd. Dit project is een ontmoeting van ontwerp met technologie en erfgoed door een samenwerking met het Bureau Monumenten en Archeologie Amsterdam en Studio Maaike Roozenburg.

http://smartreplica2015.weblog.tudelft.nl

Tentoonstelling minor Advanced Prototyping
Dinsdag 27 oktober 2015, 12:30-15:00 uur
De afsluitende lezing van Nadya Peek begint om 15:15 uur
Locatie: "De tribune", Centrale hal, Faculteit Industrieel Ontwerpen, TU Delft
Landbergstraat 15, 2628 CE Delft


Presenting the prototype in Museum Boijmans Van Beuningen


The first prototype of the Smart Replica we are developing is presented to the public and tested by the public during '24 uur cultuur' (24 hours of culture) at Museum Boijmans Van Beuningen.

dinsdag 21 oktober 2014

reconstructing the past take one: a 17th century plate

Last week Audrey Loef (Architecture), Rosan Foppen (industrial Design), Ingmar Klappe (Architecture) and Senna Meij (Industrial Design) of the Technical University Delft have been working on a project for the Minor Augmenting Prototypes. They have tested a new 3D scanning device the 'structure sensor' for its use in reconstructing historical objects. This week the object was a porcelain plate, made in the 17th century in Japan, ordered by the then Mayor of Amsterdam. The plate is part of a set of tableware that was (likely) ordered for the marriage of the mayor with Aletta Pancras that took place at august 30, 1667. This plate is part of the collection of the Amsterdam Museum, and we are greatful that we had the oppertunity to scan the object in their depot.
Other (known) part of the set of tableware are two cup-an-saucers at Museum Boijmans Van Beuningen, a plate at the Victoria&Albert in Londen and a plate at the Idemitsu Museum in Japan.
Hre you can see the plate and the 3D computer reconstruction after the scan.

17th century plate, collection Amsterdam Museum, foto Senna Meij

3D scan of Structure sensor

3D computer model, modeled after scan, bottom view

3D computer model, modeled after scan, top view (excluding decoration)

maandag 13 oktober 2014

Students Technical University Delft test 3D Structure Sensor

Last week the Minor Augmenting Prototypes at The technical University Delft took of.
Audrey Loef (Architecture), Rosan Foppen (industrial Design), Ingmar Klappe (Architecture) and Senna Meij (Industrial Design) did take up the challange to make a 3D model of a 17th century teatable at Museum Boijmans Van Beuningen, using the just developed Structure sensor. Their project can be followed at their blog
The reconstruction of this table will be part of the content of the prototype of the Smart Replicas of the 17th century Japanse teacup.


woensdag 9 juli 2014

LikeFriends is looking for a motion gfx / ux designer

We’re excited to be working with Studio Maaike Roozenburg in bringing SmartReplica’s to life. (www.maaikeroozenburg.nl or http://smartreplicas.blogspot.nl/). As per direct (this september at the very latest) we’re looking to bring to the team a talented motion graphics designer / 3D animator. If you’re a great C4D modeler and animator, and you have a natural interest in UX, gaming and technology, you’ll love working on this project.

You’ll be working closely with our creative directors and developers in creating the AR interface and 3D content for the project. This will be an iterative process; you need to be able to quickly generate and try out new ideas, and be able to tolerate throwing most of them out. We’re looking to develop various interactive scenes that the user can play, explore, and dig into, using their physical phone as the main means of navigation. So the way we tell our story is more game-like than film-like. Your lighting and rendering skills are of less importance in this than your modelling, animating, technical and creative skills.
At the end of the project we hope to ship a fully functional prototype. If we’re succesful this prototype will become the basis for a series of museum exhibits as well as a range of consumer facing products.

If that sounds like your cup of tea, shoot an email to jasper@likefriends.nl. We look forward to having you on the team!

dinsdag 13 mei 2014

Smart replicas in boek: Printing Things: Visions and Essentials for 3D Printing

Smart replicas en haar proces zijn opgenomen in het boek: Printing Things: Visions and Essentials for 3D Printing. van uitgeverij Gestalten.
Printing Things: Visions and Essentials for 3D printing


3D scnannen/3D printen en AR samen met conservator Alexandra van Dongen